How does the calendar work in the app?
You can now also view and edit your availability calendar directly in the app. Below you'll find how to locate the calendar, how to block a period, what the colours in the calendar mean, and how to add custom settings.
How do I work with the calendar in the app?
Here's how to find your calendar in the app:
Log in to the app with your account details.
Tap 'Calendar' at the bottom.
! Please note: Do you have a connection with a channel manager via OpenGDS or Smoobu? Then you manage your calendar through your channel manager.
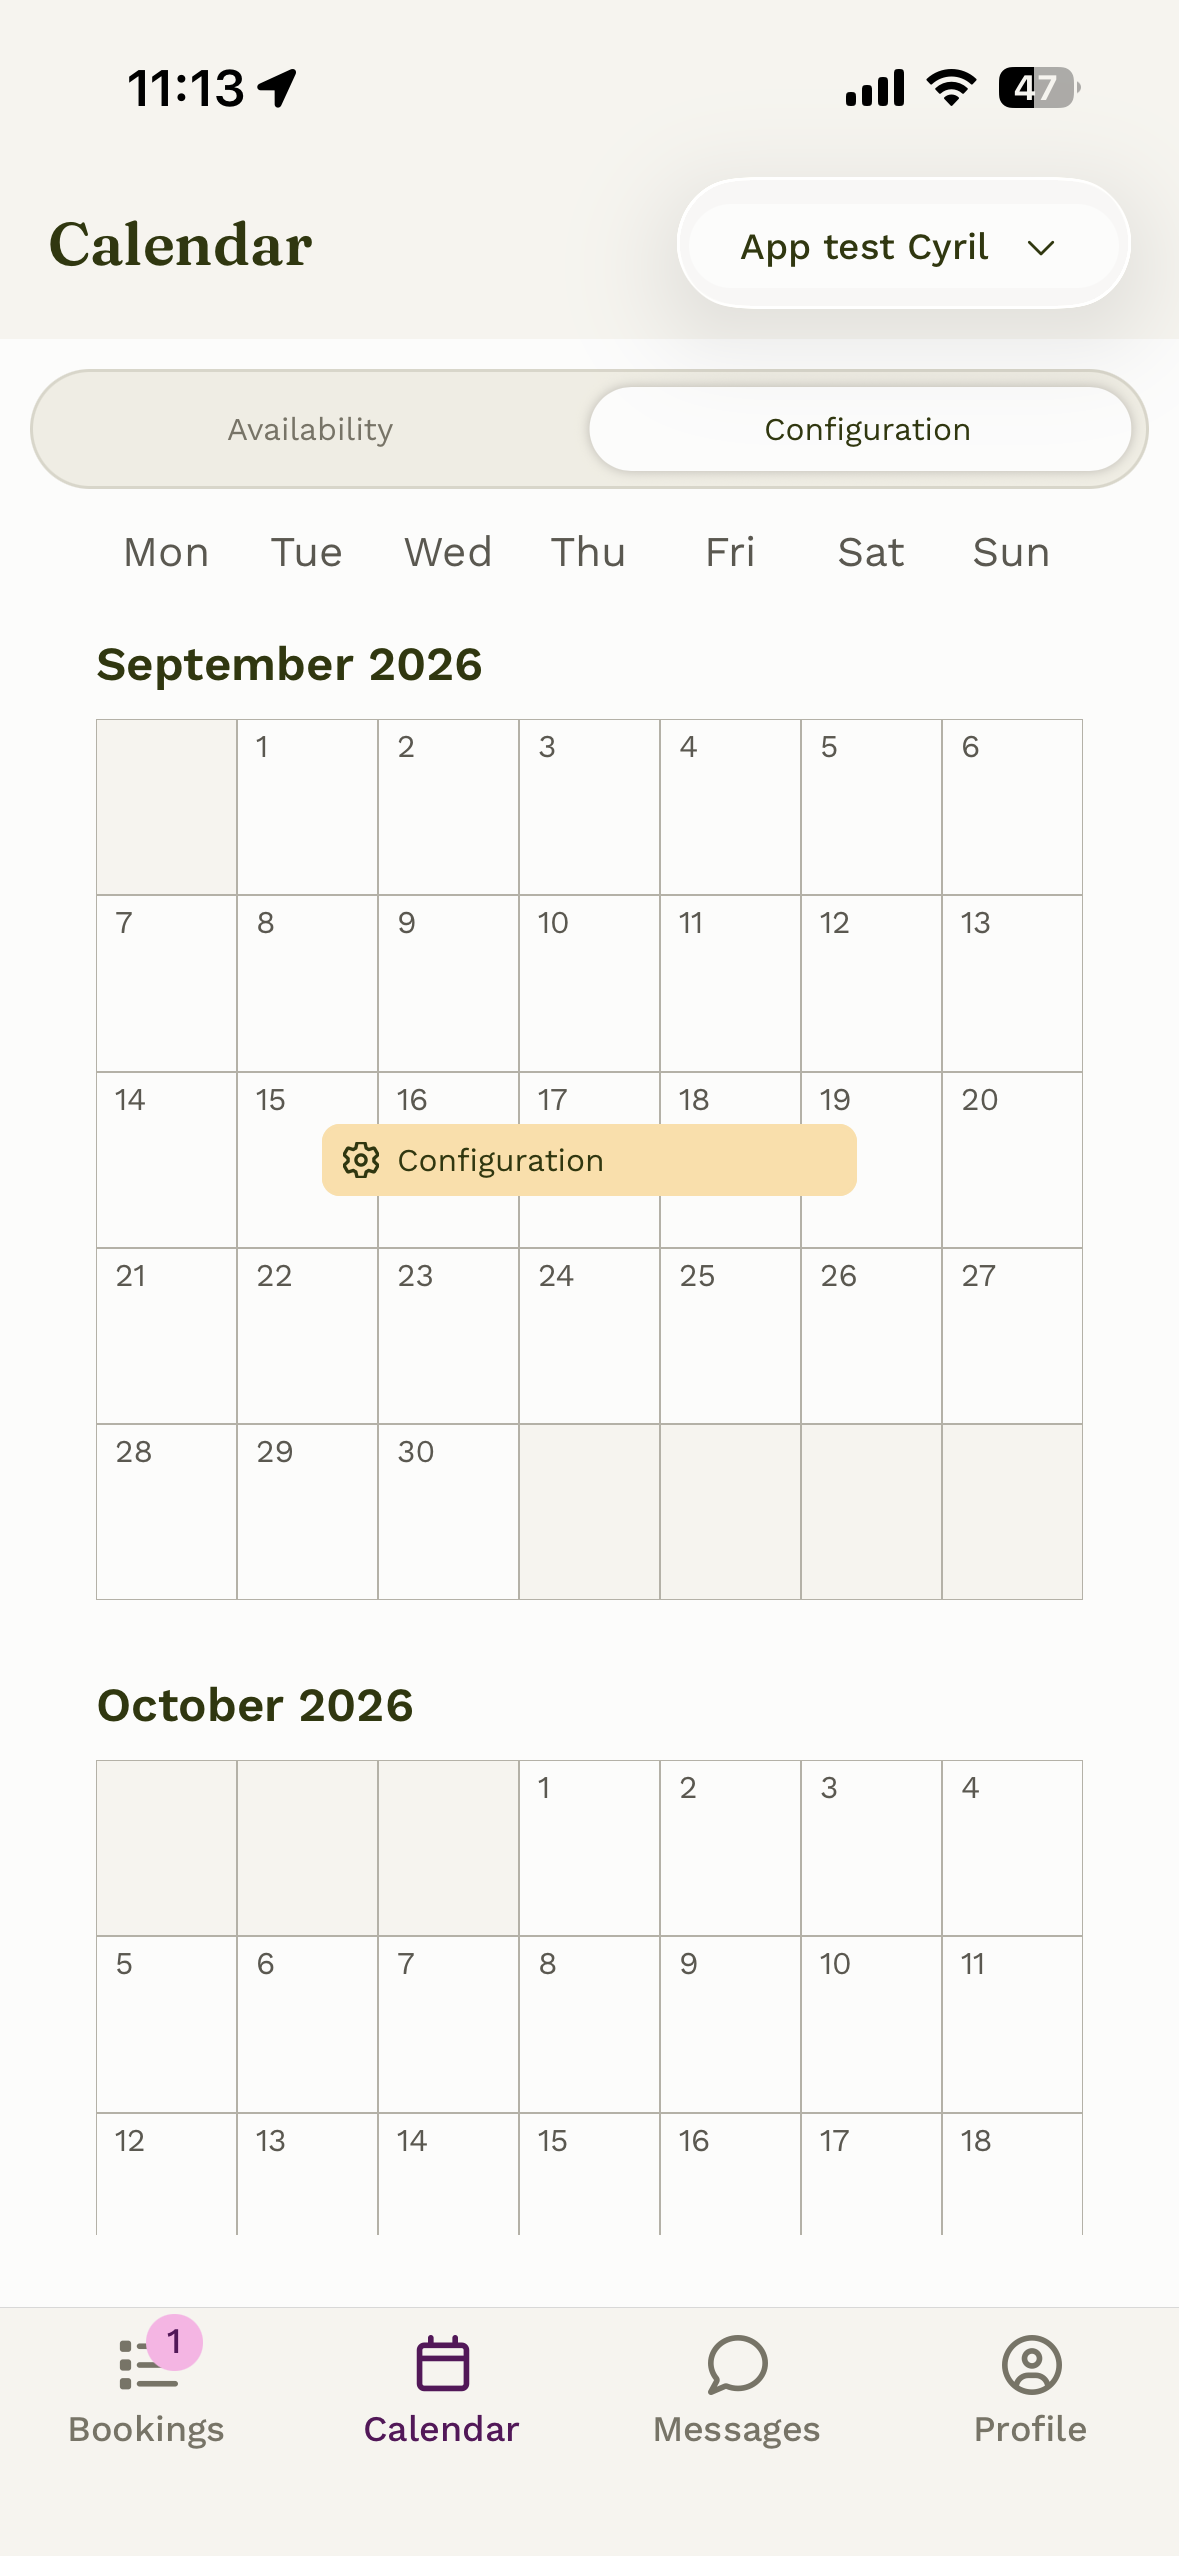
The calendar is split into two parts. If 'Availability' is shown in white, you can block and unblock periods. If 'Configuration' is shown in white, you can view and adjust custom settings (such as different rates).

Blocking a period
! Please note: From now on you block nights. In the old calendar, you blocked arrival days.
Can't or don't want to rent out a period?
Tap the start date and end date of that period in the calendar.
Then tap 'Block nights' and select a reason for the block.
Then tap 'Finish blocking'.
The period is now blocked and no longer available to guests.
Unblocking a period
Want to make a blocked period available again?
Make sure the switch above the calendar is set to 'Availability'.
Tap the blocked period you want to release in the calendar.
A pop-up appears where you can choose between 'Change date', 'Change reason' and 'Remove block'. Tap 'Remove block' and confirm your choice.
The colours in the calendar
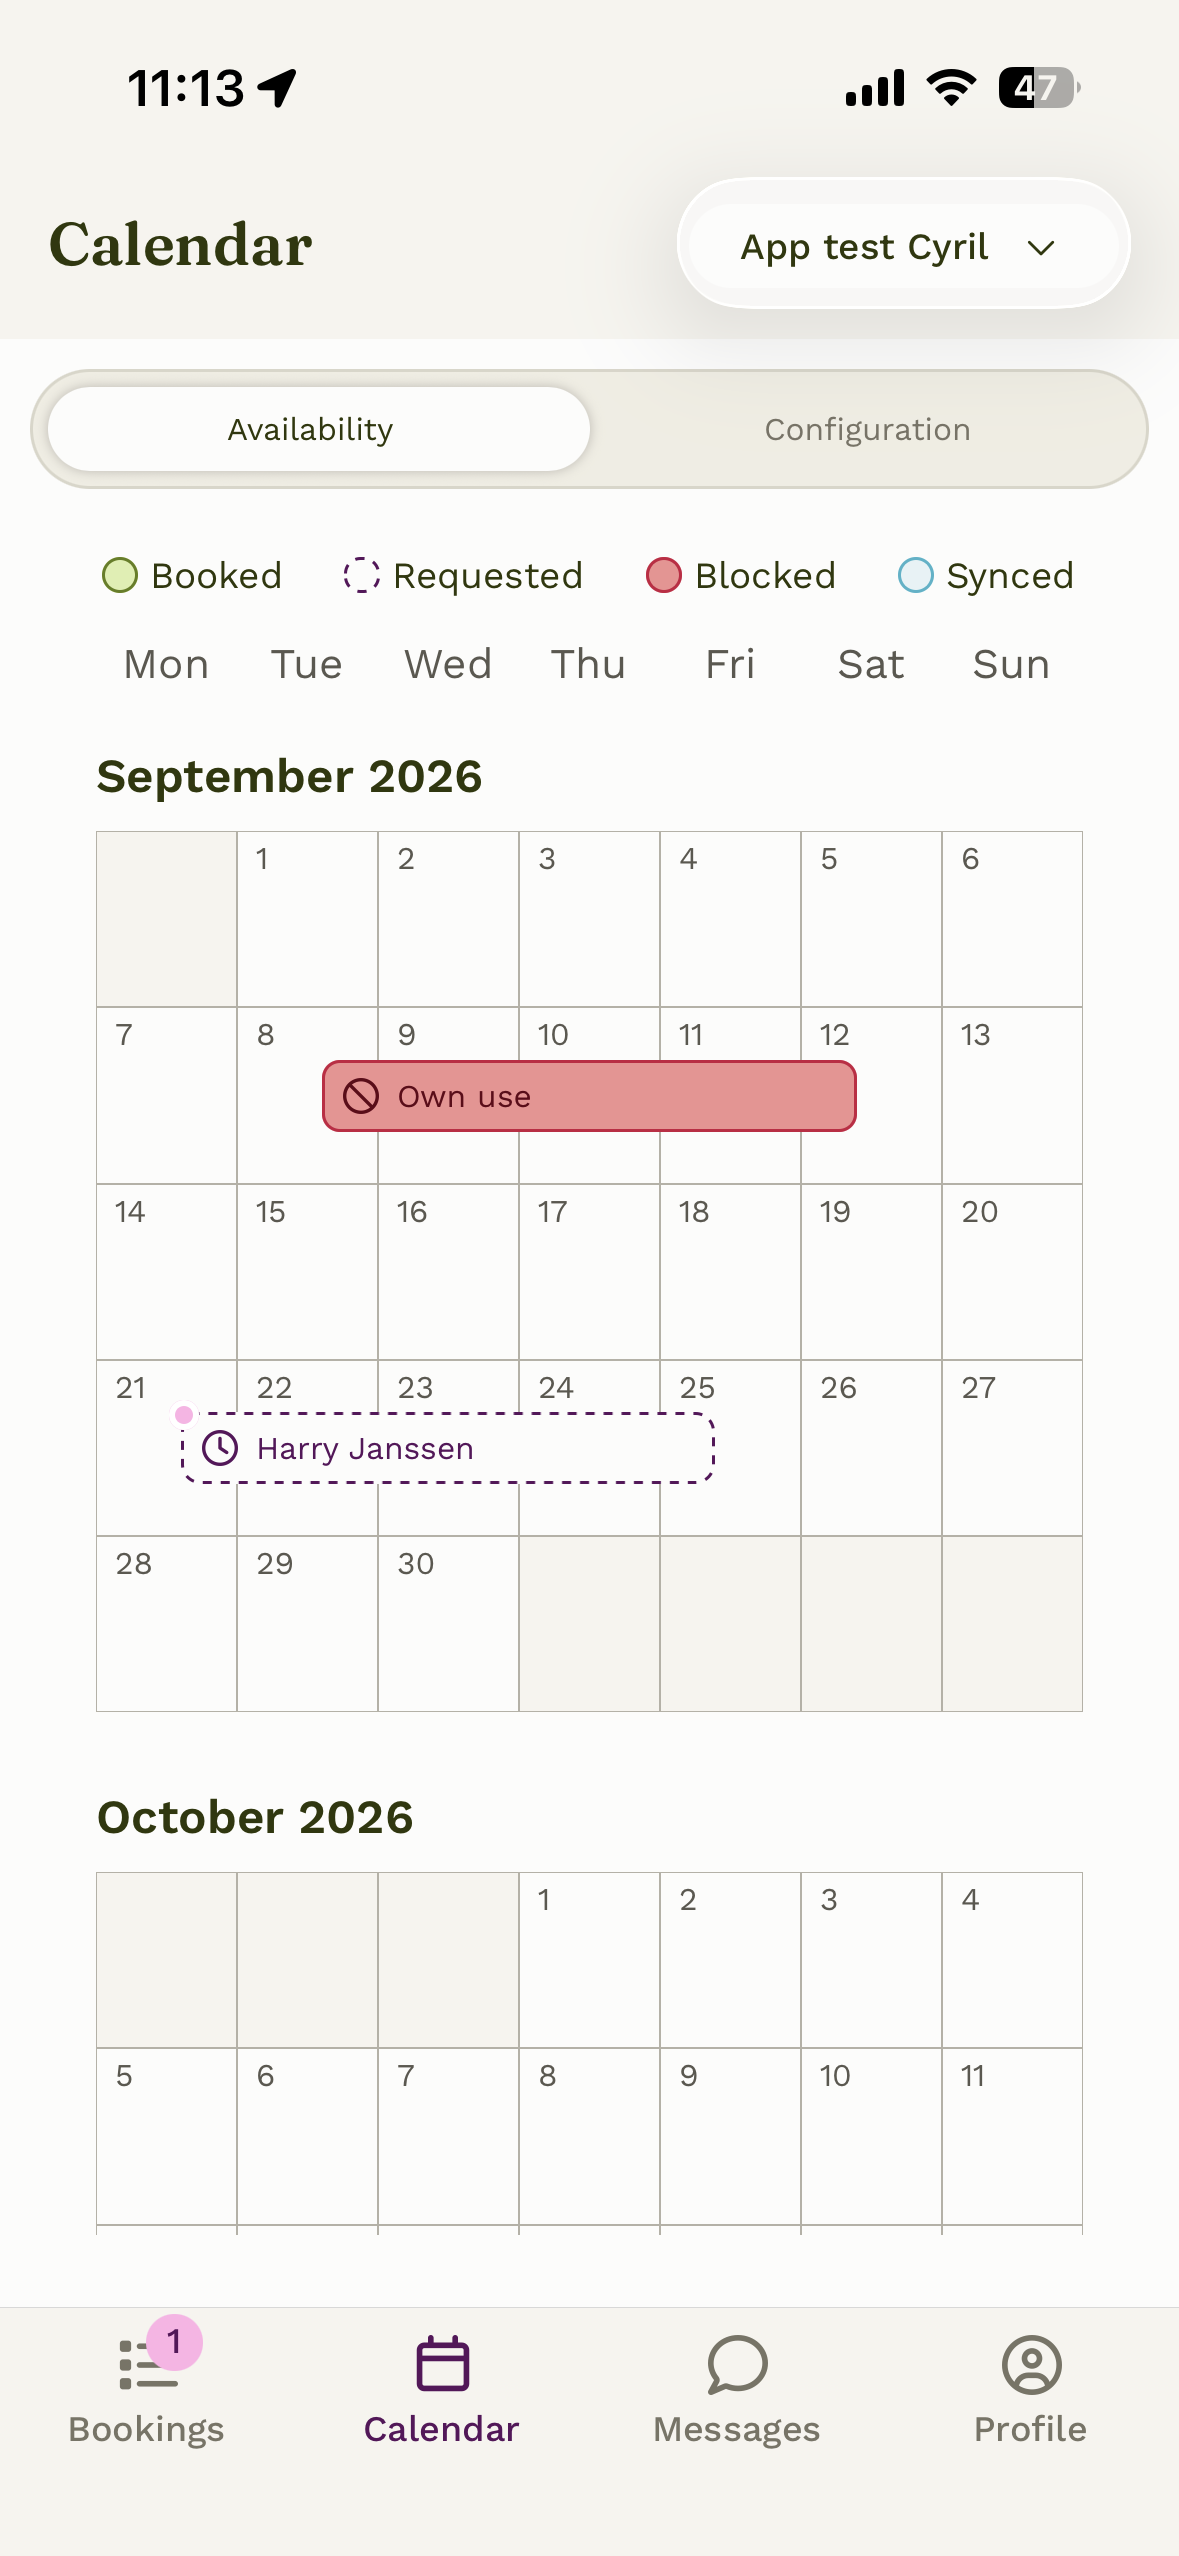
At a glance, the calendar shows you the status of each day:
White: available. Your base rate applies here.
Green: booked. This day is reserved for a Naturehouse booking. Tap it to go straight to the details.
Dashed purple: request. This is a booking request that you still need to approve or decline.
Red: blocked. You've manually blocked this night yourself. Tap it to see why, and to adjust or remove the block.
Blue: linked. This block comes from an iCal connection or channel manager. Want to release this period again? Do so via your channel manager, or contact us.
Yellow: configuration. A different rate or availability applies to this day; your base rate does not apply.
Want to set a different rate, length of stay, and/or arrival and departure days? Read on under 'How do I add custom settings to the calendar in the app?'.
How do I add custom settings/rates to the calendar in the app?
Want a different rate, a different length of stay, or different arrival and departure days for a specific period? Then you use a custom setting in the calendar.
Log in to the app with your account details.
Tap 'Calendar' at the bottom.
Tap 'Configuration' at the top of the calendar.

A day or period shown in white is available at your base rate (unless you've placed a block). Here's how to create a custom setting:
Tap the start date: the first day of your custom setting.
Tap the end date: the last day of your custom setting.
In the pop-up ('Add configuration'), tap 'Add configuration'. Enter the rate you want. If you leave a field blank, your base rate will continue to apply there.
Would you also like a different minimum or maximum length of stay, or different arrival and departure days? Fill these in too.
Save your changes. From now on, you'll see a yellow marker in the calendar on the days with a custom setting.
How do I remove a custom setting?
Want to remove an existing configuration? Follow these steps:
Tap the custom configuration.
In the pop-up, choose 'Remove configuration' at the bottom. Confirm your choice, and the configuration will be removed. Your base rate and settings will now apply again.
Want to change an existing configuration instead? You can do this via 'Edit configuration'. Make your change and select 'Save change'.